I'm Amy, a middle school teacher from Colorado, and here's a tutorial from my blog, dwell in the season, on making colorful nametags for your class! Enjoy!
. . . . . . . .
It's only the beginning of August, and I've already had two nightmares about school starting sans lesson plans.
I'm getting really excited for school to start soon, but for some reason I fear not being prepared. I guess that's not too crazy. But seriously? Two scary dreams when the kids show up and I am fumbling around trying to find last years lesson plans (which would do me little good without any copies or materials prepared) or some game to play. Scary stuff, folks.
I got a sudden crafty urge the other night to make all my students' nametags. (At least they'll know where to sit even if I have nothing else prepared.) Only to find out that I have two more new students as of yesterday. Oh, well. Always glad to have more students!
Here's what you need:
paint chips
Cricut machine or pre-cut letters (or the patience to hand-cut them)
glue stick
laminator or contact paper
I started with my paint chips.
I was very intentional about choosing the same number of warm colors as cool colors, so I can split my class up easily. (And I grabbed a few extra just in case.)
So I spent some time deciding who I want in each group when I call, "Anyone who has a warm colored nametag, go on the right side of the classroom! Cool colors on the left!" It's such an easy way to split up the class, and there are no scuffles or friend-choosing!
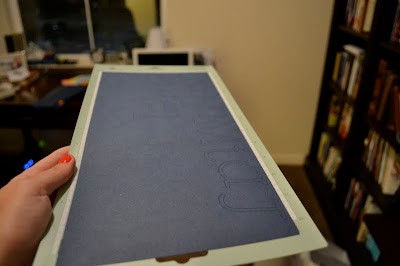
I cut my 12x12 paper in half, and smoothed it on my Cricut sticky sheets. (I'm sure there's a real name for them...?)
I typed in the students names on my Cricut, starting with the shortest names. That way I could most likely fit them on the nametag, and also be able to tell if I needed to adjust the sizing for longer names.
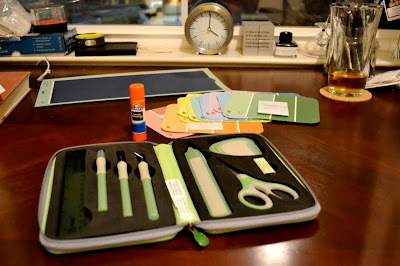
I got out my fancy-pants Cricut tool Kit. Thanks to my mother-in-law. Because my finger nail hurts pretty bad after a while if I don't use those pick-things.
Carefully peel your paper off, leaving the letters on the sticky sheet.
Gently take your letters off the sticky sheet. (I'm not really left handed...)
Dab a little glue on the back of the letters, and place them on your paint chip. I didn't use a ton of glue because I know I am going to laminate them so they will last all year.
Commandeer your husband's desk because yours is too messy small.
Realize it's now well past 11 pm, but you are just too darn excited about the project to stop now!
And there you have it, teachers! Also, I think these would be super cute on the front of kids' bedroom doors with their favorite color as the paint chip.


I saw similar ideas and I plan on doing that for dorm door decs! :)
ReplyDeleteThis is such a great idea! *dreaming of the day when I get a Cricut machine...*
ReplyDeleteI wanted to stop by and say, "HI!!" I'm in a grad program/getting a teaching credential to teach English, and I start student teaching at a middle school in Los Angeles next week. This is a fun resource! I will definitely keep up with it. If you ever need contributors, let me know!
ReplyDeleteLiz
elizabethabend.blogspot.com
I love this! So fun and creative :)
ReplyDeleteI just found your blog. What a great project! I am hosting a paint chip linky party on my blog. Thought you may want to link up this great project. I can imagine doing this for your sight words, too.
ReplyDeletehttp://learningwithmrsparker.blogspot.com/2011/10/chips-anyone.html
that is just too sweet of you, such a good idea. you must be one awesome teacher! hope you're enjoying your holiday break!
ReplyDeletecome check out my jewelry giveaway from shabby apple!
Love this! Keep blogging! I'm going into Secondary Ed. and want to encoring keeping the blogging lifestyle! Thanks for ideas. Can't wait to see more!
ReplyDeleteLove the creativity. You make it all look so simple. Thanks for posting and feel free to drop by me too when you have time.
ReplyDeleteThis blog is so useful! I'm studying to become an elementary school teacher, so I'll follow :) Good job you guys, I loved the idea!
ReplyDeleteThat's a pretty cute idea!
ReplyDeleteCome check out the Etsy giveaway I'm hosting for your chance to win a beautiful crafted necklace.
http://purrincup.blogspot.com/2012/09/shani-adi-giveaway.html
SO cute! I'm a new GFC follower :)
ReplyDeleteCool! I am not a teacher but that looks great ;)
ReplyDeletexoxo,
Taylor
Current Giveaway - The Printed Mint
Lovely DIY dear :) you are so creative <3
ReplyDeleteCaroline
http://missoline.blogspot.com
this is a really cute and creative idea!! love your blog :)
ReplyDeleteColor Poetry is another great way to use paint sample strips like these. The names of the colors are poetic already; build a poem on them. My college room was painted in Shy Violet my senior year; almost white, only looked purplish when the sun was shining in at noon. I loved it. Shy Violet became a poem, just like Blushing Piglet and Deep Rose.
ReplyDeleteWhat a fun idea! I'm sure the kiddos with love them. :-)
ReplyDeleteoh what a cool project! i love it
ReplyDeleteDelightful Ideas
$25 Sephora Gift Card Giveaway
lovely idea!
ReplyDeletehave a nice weekend
those are adorable and totally different than anything I've seen so far!
ReplyDeletexx
Erin @ http://www.truffles-ruffles.com/
This is so cute and I love how creative you are. I wish you were my teacher growing up. It's really creative and would be fun so kids can pick they're colors too
ReplyDeletexoDale
www.savvyspice.com